It has been almost a year since the last post I made! wow, how unproductive I am... --;
but here I am, I want to represent my latest work of art!
So, I went to my bestfriend wedding last Saturday, to me, the event was special, because it was my bestfriend's, so I thought I should wear something special too. And I thought it was the right moment to show off who I really am. To show my work of art. To show my passion and to show what I am capable of beside studying medicine :p
Let me show you my look on the weeding reception I went to:
I will tell you what makes my look so special to me.
1. A HANDMADE DRESS
Yeay! For the first time I managed to make a dress using brocade fabric which is so hard and tricky to work with! My other friends were using the fabric to make conventional Kebaya (Javanesse traditional woman clothes), but I tried to make it looks different, so I didn't make conventional Kebaya, but I made some different style. Let me show you the detail of the dress.
Basically it was peplum dress. You can see the peplum skirt in the picture above. I combined it with wide-sleeves and high collar. If you see it closely, you will find that the collar is messy. It is messy, because I made it just the day before the wedding day. The back part also, it was a messy work, because I made it in a rush (because I had my psychiatric exam coming up that week). But overall I really like the look I made in a very short period of time. As you can see, I'm just a med student, I don't have a real competency to work as a tailor :D but I really like how it turns out to be even if it's far from perfection :p
It was my first time too to sew a pattern on a tile fabric (see the detail in my chest). I have to cut the pattern from the brocade fabric, and sew it on tile so it looks like the original brocade. I wasn't sure about my work at first, but when I started to like it gradually. And finally, I found my confident to wear my work of art!
Below the dress, I was wearing Sogan Batik skirt. My mom and I picked the pattern. I think it suits the dress very well.
2. MY OWN MAKE UP DO
I really want to challenged my self on this thing. So I did my own makeup using my standard and basic makeup kit. I wasn't using the top recommended makeup kit to do this look, but I really satisfied. Here are the looks:


I used my favorite foundation from Kryolan and face powder from Wardah in Light Beige. Eyebrows using Brown natural brow pencil from SilkyGirl. Eyeshadow, blush on and shading by Sariayu. I was using 3 colors: gold, green, and black (and of course white for eyebrow bone). I even used a very cheap eyeprimer by VivaQueen, but it turned out to be fair enough, I mean, not too bad. I used a cheap gel liner from Pixy too, but they worked fair enough too. I used Maybelline lipstick, Summer sunset shade. And of course, falsies ;)
The only thing I didn't do my self was my hair-do. I can't make any hair-do by myself!
AND, that was it! Those two things were the reason why I felt special for my bestfriend wedding! I never really show off of my work of art, and now I DID IT!!! I am really happy about it though is far from perfection!
Starting from now on I guess I am confident enough to show my work even if it's not perfect like what tailor do. And I will keep on doing things like this :)
VIVA HONEY AND LUCKY!
Lastly, I never forget to take after-makeup-pictures. So here they are:


Hahaha, this is Halloween edition! Happy October!
but here I am, I want to represent my latest work of art!
 |
| me and the bride (my bestfriend) |
Let me show you my look on the weeding reception I went to:
 |
| me and bestfriends |
 |
| me and bestfriends |
1. A HANDMADE DRESS
Yeay! For the first time I managed to make a dress using brocade fabric which is so hard and tricky to work with! My other friends were using the fabric to make conventional Kebaya (Javanesse traditional woman clothes), but I tried to make it looks different, so I didn't make conventional Kebaya, but I made some different style. Let me show you the detail of the dress.
 |
| dress overview |
 |
| the back-look and front-look |
Basically it was peplum dress. You can see the peplum skirt in the picture above. I combined it with wide-sleeves and high collar. If you see it closely, you will find that the collar is messy. It is messy, because I made it just the day before the wedding day. The back part also, it was a messy work, because I made it in a rush (because I had my psychiatric exam coming up that week). But overall I really like the look I made in a very short period of time. As you can see, I'm just a med student, I don't have a real competency to work as a tailor :D but I really like how it turns out to be even if it's far from perfection :p
It was my first time too to sew a pattern on a tile fabric (see the detail in my chest). I have to cut the pattern from the brocade fabric, and sew it on tile so it looks like the original brocade. I wasn't sure about my work at first, but when I started to like it gradually. And finally, I found my confident to wear my work of art!
Below the dress, I was wearing Sogan Batik skirt. My mom and I picked the pattern. I think it suits the dress very well.
2. MY OWN MAKE UP DO
I really want to challenged my self on this thing. So I did my own makeup using my standard and basic makeup kit. I wasn't using the top recommended makeup kit to do this look, but I really satisfied. Here are the looks:


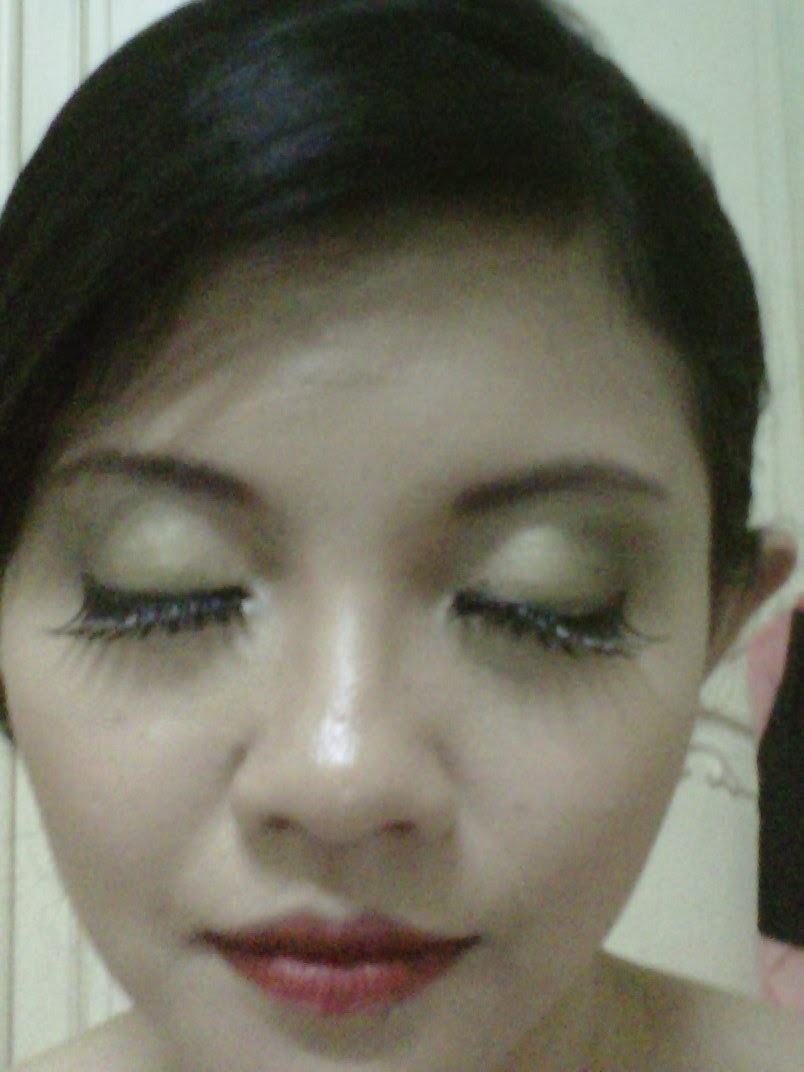
I used my favorite foundation from Kryolan and face powder from Wardah in Light Beige. Eyebrows using Brown natural brow pencil from SilkyGirl. Eyeshadow, blush on and shading by Sariayu. I was using 3 colors: gold, green, and black (and of course white for eyebrow bone). I even used a very cheap eyeprimer by VivaQueen, but it turned out to be fair enough, I mean, not too bad. I used a cheap gel liner from Pixy too, but they worked fair enough too. I used Maybelline lipstick, Summer sunset shade. And of course, falsies ;)
The only thing I didn't do my self was my hair-do. I can't make any hair-do by myself!
AND, that was it! Those two things were the reason why I felt special for my bestfriend wedding! I never really show off of my work of art, and now I DID IT!!! I am really happy about it though is far from perfection!
 |
| YEAY! I DID IT! |
Starting from now on I guess I am confident enough to show my work even if it's not perfect like what tailor do. And I will keep on doing things like this :)
VIVA HONEY AND LUCKY!
Lastly, I never forget to take after-makeup-pictures. So here they are:


Hahaha, this is Halloween edition! Happy October!
I am a big fan of America's Next Top Model, not that I wanted to become model--since I know that is impossible-- but I simply love the pictures taken on the competition, especially when Tyra Banks took it herself! She got perfect taste, arts, and eyes. Her photo shoots always turn out to be really magnificent.
One of the photoshoot Tyra Banks did in one of the ANTM cycle has inspired me in to create this post. I was looking back at the cycle 13, where Tyra Banks took all of the contestants photo with scarfs. The scarfs are styled in different ways for each of the contestant. They put the scarfs in their face, their head, or else in different ways. One of my favorite picture was Nicole's.
Then I found an old scarf--well, it's not actually scarf, but it's a goldie-fishnet-garment, which I don't know what to call it. And I started my experiment with this garment! I tried to put it in my head and covering my face in different ways. I put a classic gold necklace too--which looks like necklace from ancient ages as my only accesories.
Let's see how it turns out to be:
I had another shoot with another scarfs, a green scarfs. For the next style, I tried to use the scarf like using hijab. So it's a little more like mid-eastern style. Check it:


So, what do you think?
Please leave comments
One of the photoshoot Tyra Banks did in one of the ANTM cycle has inspired me in to create this post. I was looking back at the cycle 13, where Tyra Banks took all of the contestants photo with scarfs. The scarfs are styled in different ways for each of the contestant. They put the scarfs in their face, their head, or else in different ways. One of my favorite picture was Nicole's.
 |
| Ashley ANTM cycle 13 |
 |
| Nicole ANTM cycle 13 |
Let's see how it turns out to be:
 |
| cover up the face |
 |
| tried to look scary yet classical--ancient style |
 |
| My favorite shoot |
 |
| tried to wrap it on the head like hijab |
 |
| Another head-wrapped |
I had another shoot with another scarfs, a green scarfs. For the next style, I tried to use the scarf like using hijab. So it's a little more like mid-eastern style. Check it:

 |
| Mid eastern style--hijab styled |
 |
| A little Spanish-like |

So, what do you think?
Please leave comments
lately I've been obsessed with nail polish and nail art. There are many nail art pictures at pinterest.com that inspires me. And there happens to be a challenge to make nail art at the looxperiments.com website. So, I think this is a great opportunity to learn nail art and demonstrate the results of my study on looxperiments web. With the little money I have left, I was trying to learn how to do nail art. The result? Here you go
hmmm.. not that beautiful. Far from my expectation. Far from the "real" nail art I saw on pinterest.com. But I do learn something from this attempt. I'll tell you what mistakes I did on my first attempt:
1. I bought cheap nail polish.
Cheap nail polish has a different liquor, they are thicker or they become thick easily. the nail brush is rigid or become rigid easily. So you can't have a flat layer. you have to redo it. But unfortunately I am not a patience-type of person. So My work looks (a little?) messy.
2. Always put the light color first.
When you put the darker color first, you have to make double layer with the lighter color above the dark one, means double work, double patience. Oh, I hate it.
3. Learn how to put it full on your nails.
My nails are big, but I can't cover it to the fullest. I just don't know how to cover it all without making a mess around my nails.
4. Base coat and/or top coat is a must
I didn't use both. But if you want to make nail art (especially using cheap nail polish), you have to put base coat first and?or top coat after you finish your art. That will keep your work beautiful, glossy, shinny, and long lasting.
5. Aceton
remember, acetone is a volatile liquid! Don't forget to close the bottle or you will find it empty next time you want to clean up your nails.
That's the basic things that I learned from this attempt. Next time, I will make something just like pictures on the pinterest.com :)
see you!

 |
| My pictures |
.jpg) |
| Cheap nail polish |
.jpg) |
| my fingers |
hmmm.. not that beautiful. Far from my expectation. Far from the "real" nail art I saw on pinterest.com. But I do learn something from this attempt. I'll tell you what mistakes I did on my first attempt:
1. I bought cheap nail polish.
Cheap nail polish has a different liquor, they are thicker or they become thick easily. the nail brush is rigid or become rigid easily. So you can't have a flat layer. you have to redo it. But unfortunately I am not a patience-type of person. So My work looks (a little?) messy.
2. Always put the light color first.
When you put the darker color first, you have to make double layer with the lighter color above the dark one, means double work, double patience. Oh, I hate it.
3. Learn how to put it full on your nails.
My nails are big, but I can't cover it to the fullest. I just don't know how to cover it all without making a mess around my nails.
4. Base coat and/or top coat is a must
I didn't use both. But if you want to make nail art (especially using cheap nail polish), you have to put base coat first and?or top coat after you finish your art. That will keep your work beautiful, glossy, shinny, and long lasting.
5. Aceton
remember, acetone is a volatile liquid! Don't forget to close the bottle or you will find it empty next time you want to clean up your nails.
That's the basic things that I learned from this attempt. Next time, I will make something just like pictures on the pinterest.com :)
see you!

Yes and yes, I'm still obsessed with "Visual Kei Style". I'm still wondering how they create the style like this:
 or like this:

.jpg)
.jpg)
And then I made the shots with this make up, and guess what? Here is the look I captured:


I do really like the eye make-up, but you know I've tried it (if you want to look at my first attempt, you can see it here) and that wasn't close enough to the "real" visual kei Style.
So I learned about it more. I think there are keys of making this style:
1. Bald eyebrow (or painted eyebrow which is "high" and "thin" line)
2. Heavy smokey eye
3. Pale look
4. Nude lips or even a pale lips.
5. "cool" hair do
Then I tried these 4 steps on making my 2nd attempt. But, first thing first, I can't make any "cool" hair-do ( I don't have either wig or hair-iron to create any style). So, I just tried comical hair look, like this:
.jpg)
Messy? well, I only got a comb and bobby pins, so, this is as far as I could make :p
I tried bald eyebrows too, but I will never make it "real" bald, so I just put concealer and foundation on my eyebrow and hide it with face powder. But you know, that won't be perfect.
I also put a heavy smokey eye on my eyes with only black and white eyeshadow. But I think I had it wrong so my eyes look even bigger.
I did pale look and pale lips too. But I put a little red lipstick in the inside of my lips so I looked even more pale (don't you think so?)
So, here it was:

That's so not visual kei! That's too sweet. It's more like an anime look than visual kei. Too comical (but I like it). I changed my hair style too, but still, that was too sweet.

Okay, that wasn't a real Visual Kei. Wrong idea. So I decided to create another style. I like it, so I hope you like it too:

The 2nd attempt of this visual kei is a mess. Failed.
But I like it :)
Enjoy!

Hey hey! Long time! I just finished my new experiment. I made a coat (I don't know what to call it, but I think it is a 'coat'). This 'coat' is my design. The idea originally came up from coats in victorian era. Take a look at this:


The idea came from a "loose" and "short" type of coat just like the picture in the left. The sleeves are loose and short. And take a look at the lady in the red hat. I'm using the collar combination just like in the picture. White wrinkle collar in the inside, and ordinary coat collar on the outside.
This is the result:
.jpg)
.jpg)
.jpg)
How? To me, it looks like young knight's costume. Old, but cool. I added a belt to emphasize the shape of the coat. Without belt, the coat will look like this:
.jpg)
Right after taking this picture, I started to think "I think I know someone who look just like me in this picture!"
Tadaaaaah! Janelle Monae!
.jpg)

Do I really look like copying her style?
Well, I didn't mean to... I think we just got the same idea! Because I didn't even sing Janelle's song. I can't name any of her song. I really don't know her but I've seen her once in the TV with the exact same style just like in the picture. And I think this woman is really unique, that's why her name (and style) stuck on my mind :p
Now, take a closer look at the make up and hair do.


Okay, it may looks "Janelle", but whatever.
So, what do you think? Victorian or Janelle Monae?
Please leave comments ;)
I just graduated last week, everybody!!!!
Say, YEEEEAAAAAAHHHHH!!!!!
.jpg) I graduated with a very satisfying grade. I'm very happy but not 'that' happy because my school didn't give anything to honor my hardwork.But we are not going to talk about that. We are going to talk about the make-over I had for my graduation ceremony!
I graduated with a very satisfying grade. I'm very happy but not 'that' happy because my school didn't give anything to honor my hardwork.But we are not going to talk about that. We are going to talk about the make-over I had for my graduation ceremony!
Every graduation ceremony in Indonesia requires you to wear Indonesian traditional clothes. In this case, I wore Kebaya, a traditional clothes of Java. I entrusted it to the tailor in Jogjakarta (Wimo Modiste), but I designed it my self (with a little help and suggestion from the tailor and my mom). I chose the fabric myself. I decided to go with grey. And I wanted to show my shoulder so here we go:
the pattern looks imbalance on the chest and on my back, but it's okay (I know it is so hard to make it balance). I looked gain more weight, right? The pattern in the bottom of the dress is the most beautiful part for me. And my shoulder too, of course. I love it! I combined my kebaya with dark blue-grey batik on bottom. And I wore a pair of beautiful sandals with the same colour: black, grey, and dark blue.
This is the way I looked from up to bottom

.jpg)
They put the lighter grey on the eye-tape. I asked them to put darker grey to match my dress. So here it is:
I have a different eyelid between my right and left eye. And the eye-tape made it look uneven. It's hard for me to open my eyes, and you can see it in my picture, that my left eye is narrow. But I like the eyeshadow though. Actually the eye tape made the lighter grey eyeshadow pop out, but still, I'm not a fan of eye tape.
Say, YEEEEAAAAAAHHHHH!!!!!
.jpg) I graduated with a very satisfying grade. I'm very happy but not 'that' happy because my school didn't give anything to honor my hardwork.But we are not going to talk about that. We are going to talk about the make-over I had for my graduation ceremony!
I graduated with a very satisfying grade. I'm very happy but not 'that' happy because my school didn't give anything to honor my hardwork.But we are not going to talk about that. We are going to talk about the make-over I had for my graduation ceremony!Every graduation ceremony in Indonesia requires you to wear Indonesian traditional clothes. In this case, I wore Kebaya, a traditional clothes of Java. I entrusted it to the tailor in Jogjakarta (Wimo Modiste), but I designed it my self (with a little help and suggestion from the tailor and my mom). I chose the fabric myself. I decided to go with grey. And I wanted to show my shoulder so here we go:
.jpg) |
| from behind |
the pattern looks imbalance on the chest and on my back, but it's okay (I know it is so hard to make it balance). I looked gain more weight, right? The pattern in the bottom of the dress is the most beautiful part for me. And my shoulder too, of course. I love it! I combined my kebaya with dark blue-grey batik on bottom. And I wore a pair of beautiful sandals with the same colour: black, grey, and dark blue.
 |
| bought it on Elizabeth store (jogja) |

Now, we are going to talk about make up. I went to Kartini Salon for my make up and hair do. First they did my hair. They put traditional hair-do called sanggul. It was made from my own hair. Take a look:
.jpg)
For make up, they put quite heavy makeup on my face. They used solid foundation with a really bright color (too bright for me-- compare to my hand). It looked really bad at first because my face was far brighter than my shoulder. So, I had to put foundation and powder on my shoulder too to make it just the as bright as my face. And thank God nobody noticed the difference and nobody noticed it in the picture :D
They put fake eyelashes (of course), and what I love the most was my eyebrows. They drew it perfectly (with Viva eyebrow pencil, I think). I like it so much! And they used eye-tape on my lid, they said my eye-lids weren't big enough, in order to make my eyeshadow pop out, they had to use eye-tape on my lid, without any eyeshadow base, just concealer (photoready by revlon). And they used pencil eyeliner for my eye.
 |
| eye makeup |
 |
| look at my eyebrow |
They didn't use much blush on my cheek and no bronzer. Just a light blush. Actually I asked them to put bloody-red lipstick, but the color you see on my picture was the darkest red they had. So I had to go with this even if I wanted Taylor Swift red lips so much.
.jpg)
Without those traditional touch on my face, without the hair, and the dress, this was my look after the ceremony:

This is my look on the ceremony:
.jpg)
 |
| taken from my other blog: rumahindik.blogspot.com |

It really looks like a painting, wow, I wonder how heavy those make up was! I looked completely different. Well, that's the power of make up :D
So, what do you think?


.jpg)